> ## Documentation Index
> Fetch the complete documentation index at: https://docs.grdflo.com/llms.txt
> Use this file to discover all available pages before exploring further.
# Adding Your First Charger
> Learn how to create a charger group, add a charger, and connect it to GridFlow Core
This guide assumes you have already created a new organization and activated it as your current organization. If you haven't, please refer to the [Account Creation & Initial Setup](/docs/getting-started/quick-start-guide/account-creation-and-initial-setup) guide first.
## Overview
Adding your first charger involves three main steps:
1. Creating a charger group
2. Adding a charger
3. Connecting the charger to GridFlow Core
Let's get started!
## Creating a Charger Group
It's crucial to create a Charger Group before adding individual chargers. A Charger Group is designed for a specific location and class of chargers, allowing for unified tariff application.
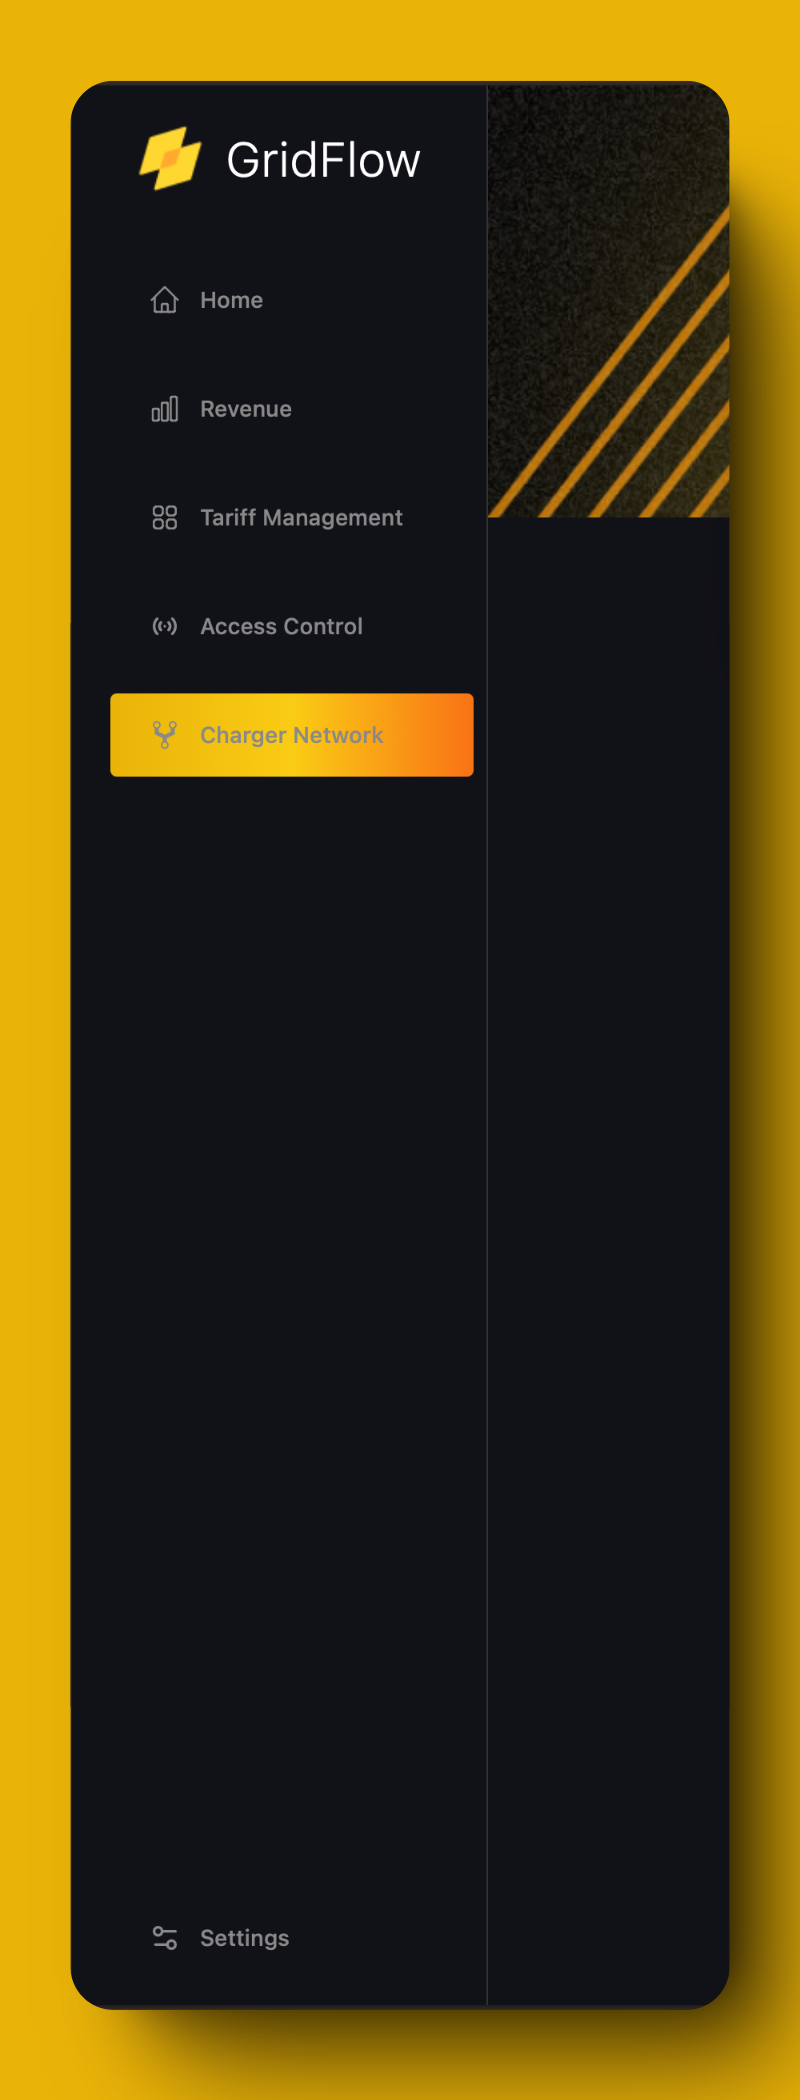
Access the Charger Network page from the sidebar on the left.
 On the Charger Network page, click on the Groups tab.
Click on the "Add Charger Group" button in the top left of the table. A sidebar will open on the right of the screen.
Provide the following information:
Choose a descriptive name for your group (e.g., "Downtown Public Chargers")
Use the autofill feature for accurate address entry
Add any relevant details about this group of chargers
Provide specific location details to help users find the chargers
On the Charger Network page, click on the Groups tab.
Click on the "Add Charger Group" button in the top left of the table. A sidebar will open on the right of the screen.
Provide the following information:
Choose a descriptive name for your group (e.g., "Downtown Public Chargers")
Use the autofill feature for accurate address entry
Add any relevant details about this group of chargers
Provide specific location details to help users find the chargers
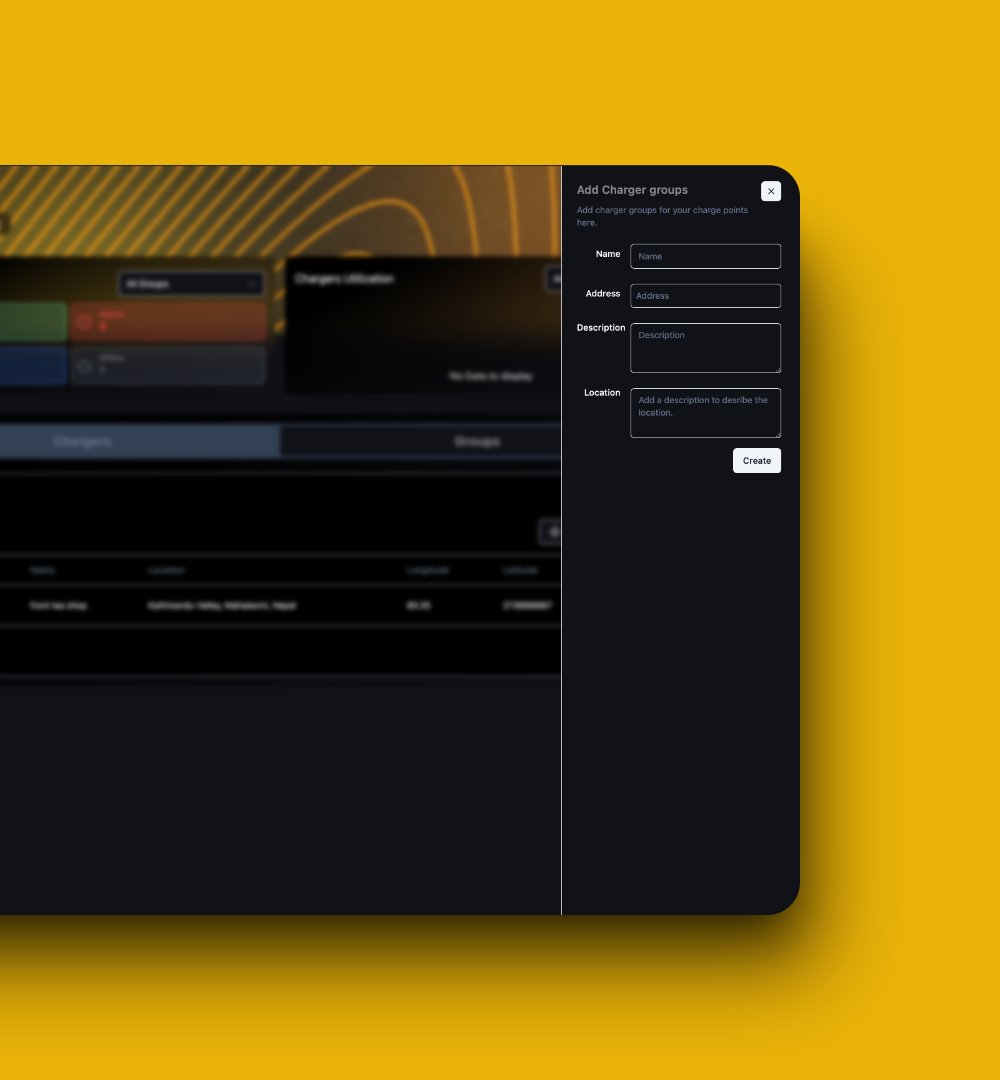 Press the "Create" button to finalize the charger group creation.
Congratulations! You've successfully created your first Charger Group.
## Adding a Charger
Now that you've created a charger group, let's add a charger to it.
From the Charger Network page, select the Chargers tab.
Click on the "Add Charger" button in the top left of the table. A sidebar will open on the right.
Provide the following information:
* Name e.g., "Downtown Charger 1"
* ID e.g., "DT\_CH\_001"
* Charger Group Choose from dropdown
* Charger Make e.g., "ChargePoint"
* Charger Model e.g., "CT4000"
* Charger Type e.g., "Type 2"
* Max Voltage e.g., "400V"
* Max Amperage e.g., "32A"
* Max Charging Power e.g., "22kW"
* Warranty Expiry Date Select from calendar
* Serial Number e.g., "CP4000-123456"
Press the "Create" button to finalize the charger group creation.
Congratulations! You've successfully created your first Charger Group.
## Adding a Charger
Now that you've created a charger group, let's add a charger to it.
From the Charger Network page, select the Chargers tab.
Click on the "Add Charger" button in the top left of the table. A sidebar will open on the right.
Provide the following information:
* Name e.g., "Downtown Charger 1"
* ID e.g., "DT\_CH\_001"
* Charger Group Choose from dropdown
* Charger Make e.g., "ChargePoint"
* Charger Model e.g., "CT4000"
* Charger Type e.g., "Type 2"
* Max Voltage e.g., "400V"
* Max Amperage e.g., "32A"
* Max Charging Power e.g., "22kW"
* Warranty Expiry Date Select from calendar
* Serial Number e.g., "CP4000-123456"
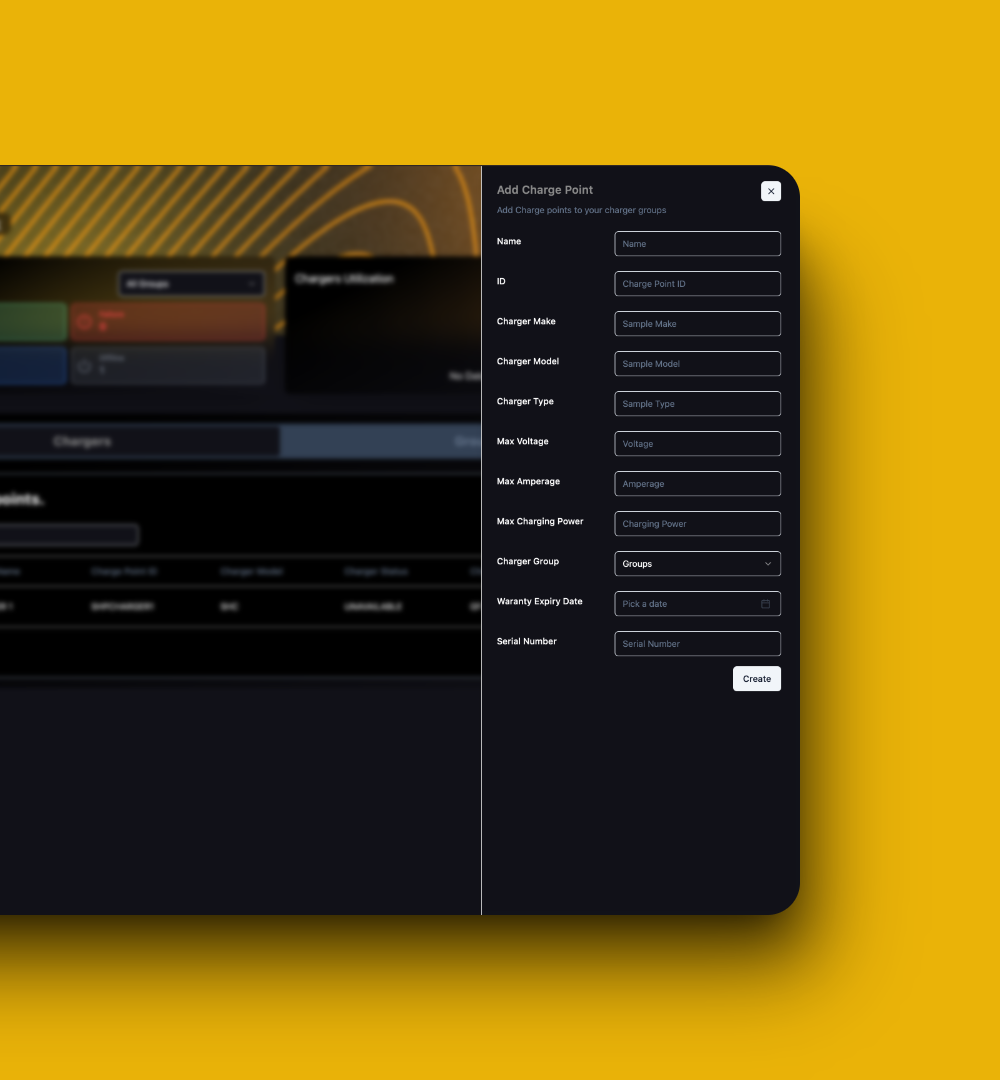 Click on the "Create" button. You should now see your charger on the Charger Network Page under "Your Chargers" (initially shown as offline).
 Congratulations! You've successfully added your first charger.
## Connecting Your Charger
GridFlow supports EV chargers made by 3000+ manufacturers that run on the OCPP1.6J Protocols.
Click on the charger you just added in GridFlow Core. A modal will pop up with the WebSocket config URL for your charger.
The endpoint format is: `wss://core.grdflo.com/ocpp/1.6/central_system/`
Replace `` with your actual charge point ID.
1. Access the charge point's configuration interface (refer to your manufacturer's manual).
2. Locate the section for inputting the WebSocket URL.
3. Enter the provided URL, ensuring the correct charge point ID is included.
4. Save the settings and restart your charge point if necessary.
The exact steps may vary depending on your charger's make and model. Always consult your manufacturer's documentation.
Ensure the charge point sends a Boot Notification upon startup. This confirms the connection to the central system.
* Configure regular heartbeat messages (interval typically set in charge point settings).
* Ensure the charge point sends status notifications (e.g., Available, SuspendedEVSE, Unavailable).
* Monitor these notifications in the central system.
## Verification
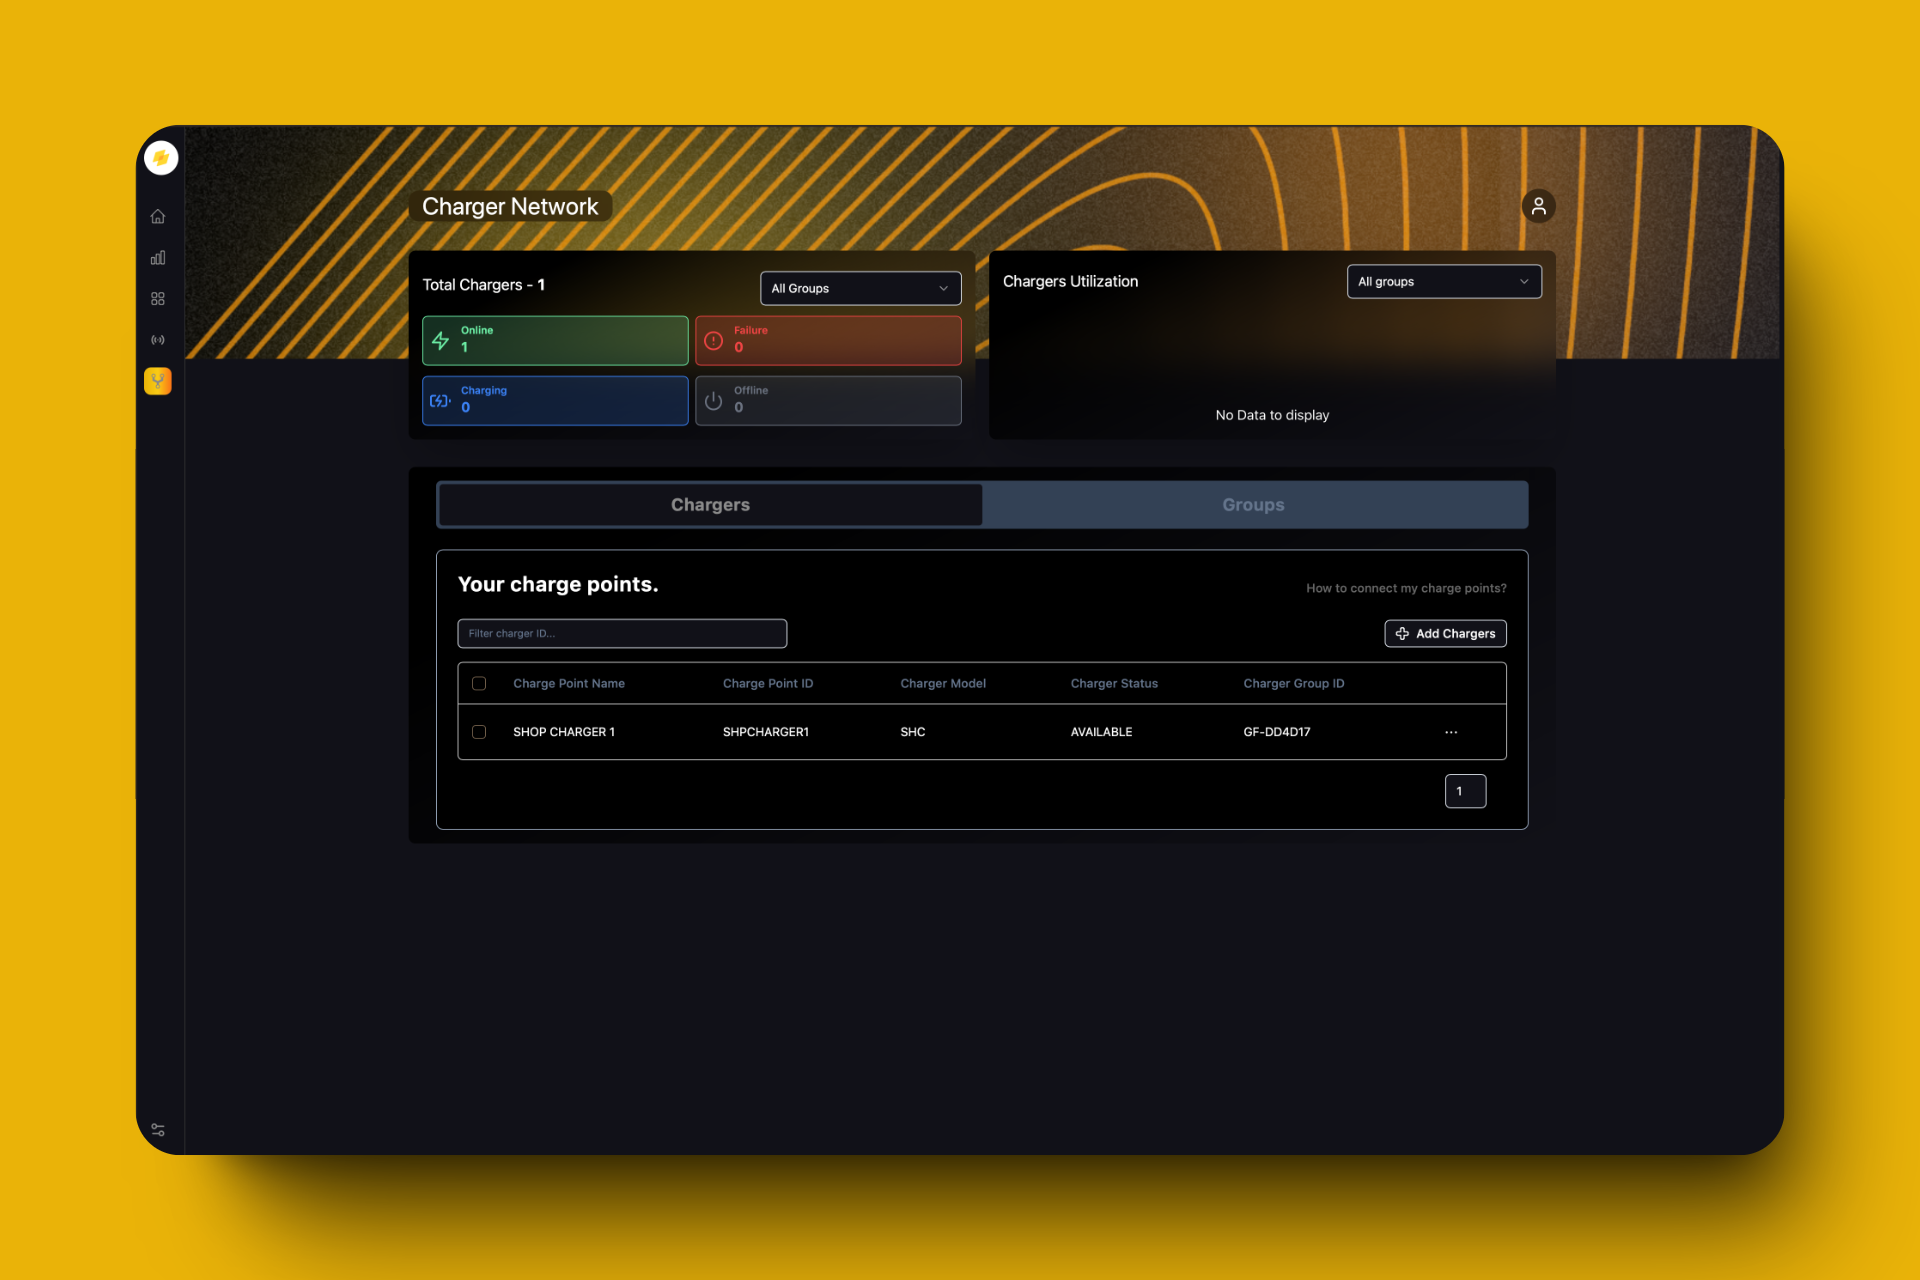
If everything went smoothly, you should now see:
* Your charger's status on the Charger Network page as "Available"
* 1 Online charger in the Total Charger Statistics
Congratulations! You've successfully added your first charger.
## Connecting Your Charger
GridFlow supports EV chargers made by 3000+ manufacturers that run on the OCPP1.6J Protocols.
Click on the charger you just added in GridFlow Core. A modal will pop up with the WebSocket config URL for your charger.
The endpoint format is: `wss://core.grdflo.com/ocpp/1.6/central_system/`
Replace `` with your actual charge point ID.
1. Access the charge point's configuration interface (refer to your manufacturer's manual).
2. Locate the section for inputting the WebSocket URL.
3. Enter the provided URL, ensuring the correct charge point ID is included.
4. Save the settings and restart your charge point if necessary.
The exact steps may vary depending on your charger's make and model. Always consult your manufacturer's documentation.
Ensure the charge point sends a Boot Notification upon startup. This confirms the connection to the central system.
* Configure regular heartbeat messages (interval typically set in charge point settings).
* Ensure the charge point sends status notifications (e.g., Available, SuspendedEVSE, Unavailable).
* Monitor these notifications in the central system.
## Verification
If everything went smoothly, you should now see:
* Your charger's status on the Charger Network page as "Available"
* 1 Online charger in the Total Charger Statistics
 Congratulations! You have successfully added your first charger to GridFlow Core.
## Next Steps
Now that you've added your first charger, consider exploring these essential features:
Set up access control for your chargers
Configure pricing for your charging services
Understand and resolve charger issues
Track and analyze charging sessions
Our support team is here to help:
[support@core.grdflo.com](mailto:support@core.grdflo.com)
Chat with us in real-time by clicking on the chat icon in the bottom right corner.
Congratulations! You have successfully added your first charger to GridFlow Core.
## Next Steps
Now that you've added your first charger, consider exploring these essential features:
Set up access control for your chargers
Configure pricing for your charging services
Understand and resolve charger issues
Track and analyze charging sessions
Our support team is here to help:
[support@core.grdflo.com](mailto:support@core.grdflo.com)
Chat with us in real-time by clicking on the chat icon in the bottom right corner.